Two-factor authentication, abbreviated as 2FA, is also called two-factor verification, two-factor authentication, two-factor authentication, and 2-Step Verification. It is a special case of multi-factor authentication. It uses two different elements to randomly generate a verification code based on time for verification with the server to confirm the user's identity.
There are many free two-step verification tools on the market, and each tool is roughly the same, but there are also some differences. Some people may pay more attention to security when choosing a two-step verification tool, and think that those two-step verification software with synchronization have the risk of leakage; some people pay more attention to multi-device synchronization, because once the phone is lost or damaged, the two-step verification tool cannot recover the data, which will bring disastrous consequences.The article originates fromSinsTu NI-https://www.sinstu.com/archives/140.html
The article originates fromSinsTu NI-https://www.sinstu.com/archives/140.html
一、Authenticator Pro
website:The article originates fromSinsTu NI-https://www.sinstu.com/archives/140.html
- https://github.com/jamie-mh/AuthenticatorPro
Authenticator Pro is a free and open source two-factor authentication app for Android that supports TOTP, HOTP, mOTP (Mobile-OTP) and Steam, is compatible with Wear OS, and can import existing configurations from other two-factor authentication apps such as Steam, Authy, Microsoft, Google, Blizzard, etc.The article originates fromSinsTu NI-https://www.sinstu.com/archives/140.html
Disadvantages: Authenticator Pro does not support synchronization and does not support IOS.The article originates fromSinsTu NI-https://www.sinstu.com/archives/140.html
二、ente Authenticator
website:The article originates fromSinsTu NI-https://www.sinstu.com/archives/140.html
- https://github.com/ente-io/auth
ente Authenticator is an open source 2FA (Two-factor authentication) tool that supports Android and iOS, and the desktop client will be released soon. It has cloud storage, cross-device synchronization, end-to-end encryption, import and export, and other functions.The article originates fromSinsTu NI-https://www.sinstu.com/archives/140.html

Disadvantages: Ente Authenticator cannot import from other similar two-factor authentication software.The article originates fromSinsTu NI-https://www.sinstu.com/archives/140.html
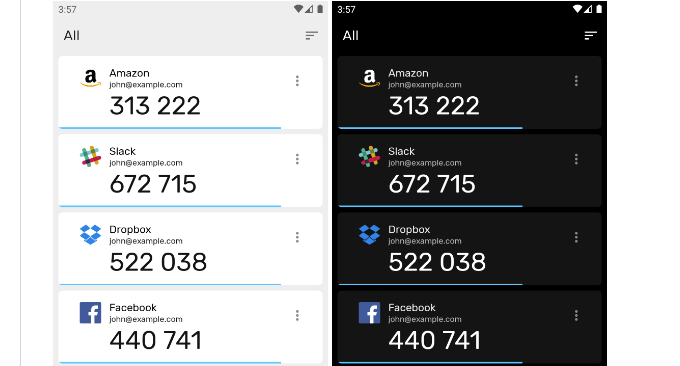
三、Google Authenticator
website:The article originates fromSinsTu NI-https://www.sinstu.com/archives/140.html
- https://play.google.com/store/apps/details?id=com.google.android.apps.authenticator2
Google Authenticator , also known as Google Authenticator, is a software produced by Google and has Android and iOS clients.The article originates fromSinsTu NI-https://www.sinstu.com/archives/140.html

Disadvantages : Google Authenticator does not support cloud synchronization , and cannot be imported from other similar two-factor authentication software. Google Authenticator now supports cloud synchronization. (Update)
Authy
website:
- https://authy.com/
Authy is a two-step verification application based on the TOTP protocol. It supports iOS, Android, Blackberry, and Chrome. It can be synchronized across different devices and supports setting a master password. Authy is suitable for all platforms including Android and iOS mobile devices as well as Windows, Apple Watch, and desktop programs.
Disadvantage : authy does not support export.
五、Mattrubin Authenticator
website:
- https://github.com/mattrubin/Authenticator
Mattrubin Authenticator is a simple, free, open source two-factor authentication tool.
Cons : Mattrubin Authenticator doesn’t have cloud syncing capabilities and is iOS-only.
六、Aegis Authenticator
website:
- https://github.com/beemdevelopment/Aegis
Aegis Authenticator is a free and open source two-factor authentication (2FA) application that can import and export, encrypt, customize icons, night themes, and highlight selected items.
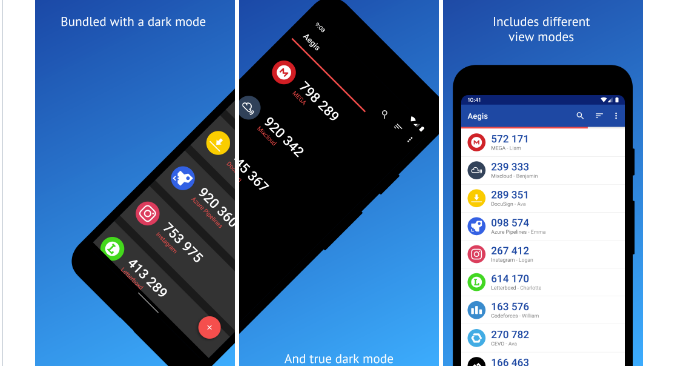
Cons : Aegis Authenticator doesn’t have cloud syncing and is only available for Android.
七、Microsoft authenticator
website:
- https://www.microsoft.com/security/mobile-authenticator-app
Microsoft Authenticator is a two-factor authentication app released by Microsoft. It can help you log in to your Microsoft account without entering a password, manage two-factor authentication codes for other websites, support password synchronization from the Edge browser, and automatically fill in passwords on iPhone and Android devices.
Disadvantages : A Microsoft account is required to log in, and Microsoft Authenticator does not support export.
8. Yandex Key
website:
- https://play.google.com/store/apps/details?id=ru.yandex.key
Yandex.Key is an authenticator that generates one-time passwords (OTP) for Yandex, Google, GitHub, Dropbox, Vk.com and other services with two-factor authentication (2FA).
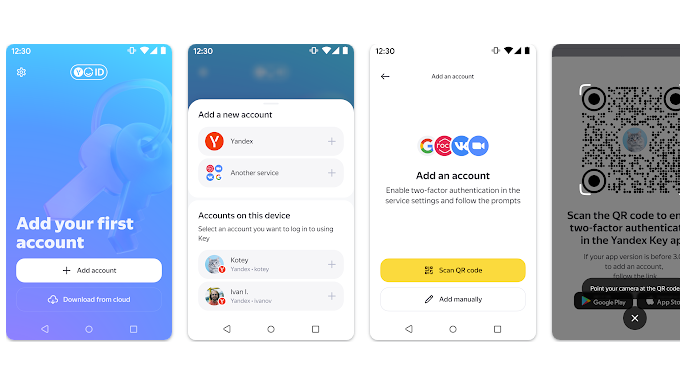
Disadvantages : Yandex.Key does not support synchronization.
九、Tofu Authenticator
website:
- https://github.com/iKenndac/Tofu
Tofu Authenticator is a 2FA software for iOS platform. It is completely free and open source. It can help you protect mainstream social and user accounts and is suitable for any service that supports HOTP and TOTP algorithms.

Cons : Tofu Authenticator is only available on iOS.
十、2FA Authenticator
website:
- https://github.com/twofas
2FA Authenticator has a good UI interaction experience, supports export and Google Drive backup, is compatible with more than 500 services, can generate time-based one-time passwords, push notifications and cloud synchronization to back up your authentication tokens.
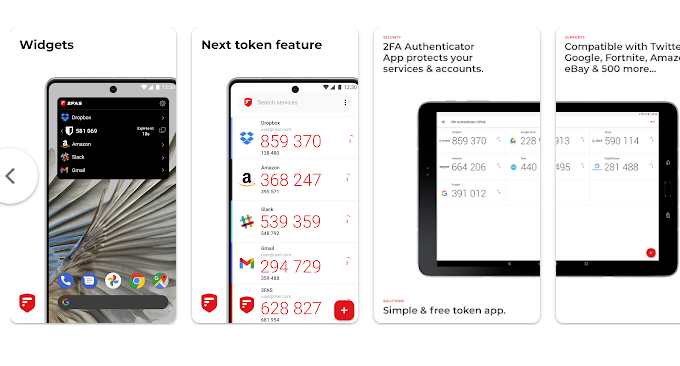
Disadvantages : No Chinese language.
11. Summary
There are many free two-step authentication and two-factor verification 2FA software. If you want the most secure one, choose Google Authenticator. If you want more functions and can support multi-device login at the same time, choose Authy. As for other two-factor verification tools, each has its own characteristics and advantages. You can choose according to your needs.